

Single Sign-on setup
If your company is using Active Directory or an online identify provider (IdP), you can enhance security and make life easier for you and your portal users with our single sign-on (SSO) support. We support all common identity providers either directly or through generic SAML 2.0.
When you add a portal user and assign them a single sign-on option, there is no password to worry about – and if your identify provider support IdP initiated login, they will not even need to know their username. We currently support Office 365 (O365), Azure Active Directory (Azure AD), Active Directory Federation Services (AD FS), Okta directly and any other SAML 2.0 identity provider using our generic SAML integration.
Generic SAML
If you are not using O365, Azure AD, AD FS or Okta, we do support SSO with any SAML identity provider. This means you can easily integrate with any SAML single sign-on provider, such as DUO, F5, Netscaler, One login, Idaptive or RSA.
To set up generic SAML SSO, you simply create a SAML Single sign-on domain with Generic SAML as the provider on the Single Sign-on Setup page in your Admin Portal. If your IdP supports automatic configuration, download our metadata at https://www.adminbyrequest.com/samlmeta. If not, then use the following settings:
- Consumer URI: https://www.adminbyrequest.com/saml
- Service Provider Entity ID: https://www.adminbyrequest.com/samlmeta
- NameID format: E-mail address
After setting up the service provider (SP), download the IdP / Federation metadata as XML and upload it to on the Single Sign-on Setup page and assign the login to users.
Office 365
To add an Office 365 login, you simply pick it as the sign-on method on the Portal User Logins page when adding a new user without any further configuration.
Office 365 login requires that users are allowed to consent to apps. You can enable this under Users and groups / User settings in the Azure Active Directory admin center. Once all portal users have logged into the portal, the option to consent to apps can be disabled without affecting future logins.
Azure AD without Office 365
It is possible to login using an Azure Active Directory without using Office 365. Start by adding a new single sign-on domain on the Single Sign-on Setup page. Pick ADFS as provider.
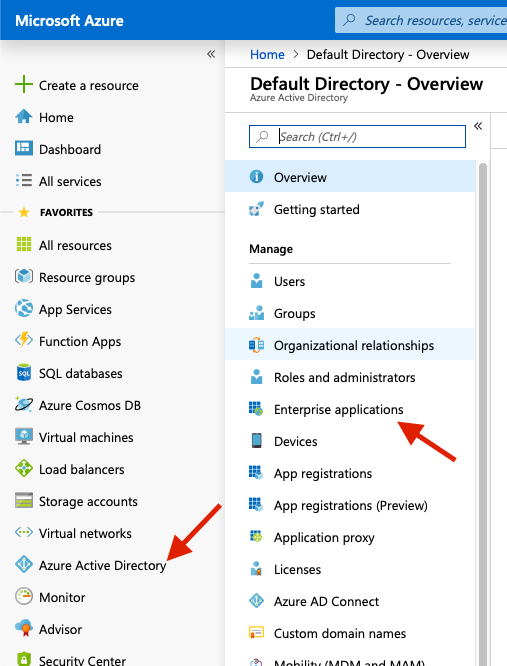
In the Microsoft Azure Portal go to Azure Active Directory / Enterprise Applications. Select New Application, Non-gallery application and enter Admin By Request as the name.
Go to Single sign-on and select SAML. Enter the following values under Basic SAML Configuration:
- Identifier (Entity ID): https://www.adminbyrequest.com/samlmeta
- Reply URL (Assertion Consumer Service URL): https://www.adminbyrequest.com/saml
Now edit User Attributes & Claims to set Name identifier value to user.mail.


Now download your Federation Metadata XML and add it to Admin By Request under the Add Identity Provider (IDP) Metadata section.

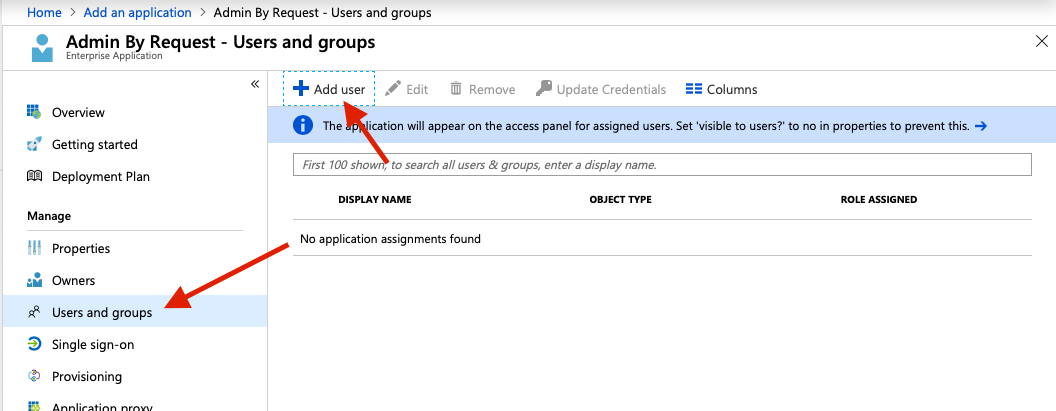
Final step is assigning users that need access to the application. This is done on the Portal User Logins page. Simply add a user and select ADFS Single sign-on for [domain name] as Sign-on method. On Microsoft Azure you need add the same user under Users and Groups for the Admin By Request application.
Active Directory Federation Services (ADFS)
Active Directory Federation Services is a component for Windows Server that connects your inhouse Active Directory to external websites using SAML. This will allow users to log in to the portal using their normal AD login credentials.
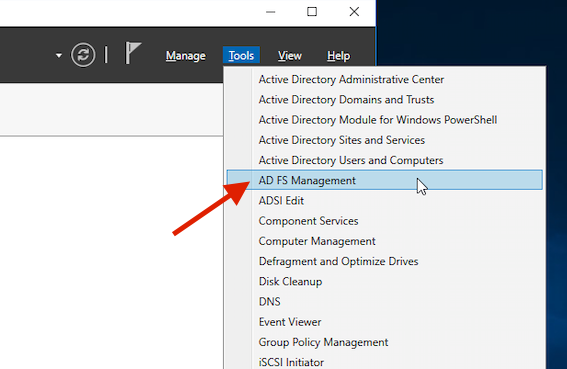
To use this guide you will need a functional ADFS setup on your Windows Server before continuing. Start by creating an ADFS single sign-on option here in the portal on the Sngle Sign-on Setup page. Next, on your Windows Server, open AD FS Management from the Server Manager.
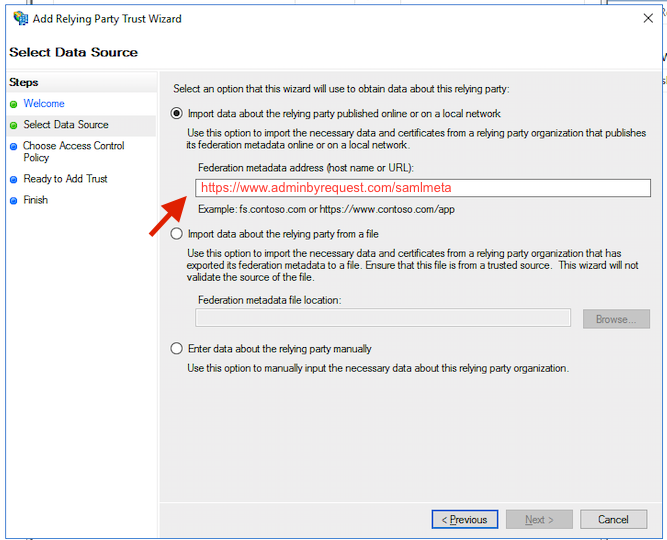
Add a new Relying Party Trust by clicking the option in the right side of the window. Select Claims aware.
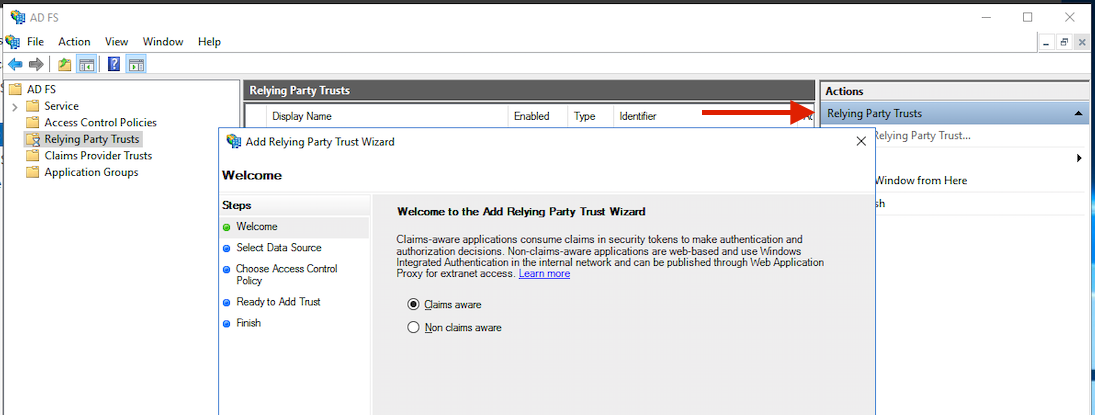
Insert the federation metadata address: https://www.adminbyrequest.com/samlmeta. This will handle most of the relying party trust setup for you. Click through the steps of the wizard.
After the new relying party trust has been added, right-click it. Pick Edit Claim Insurance Policy. Here you need to add the data sent to the portal during login.
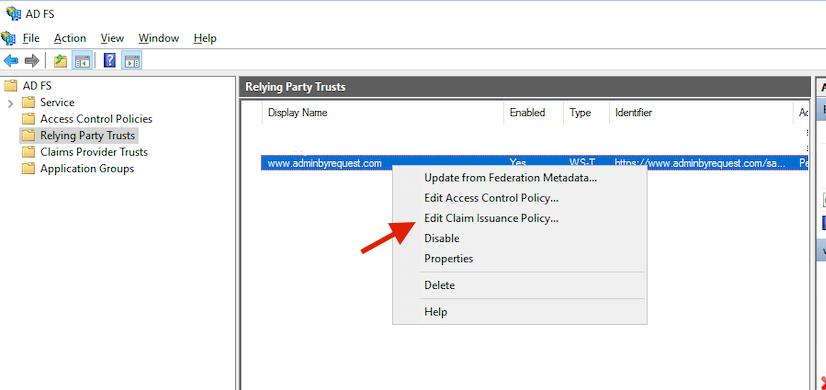
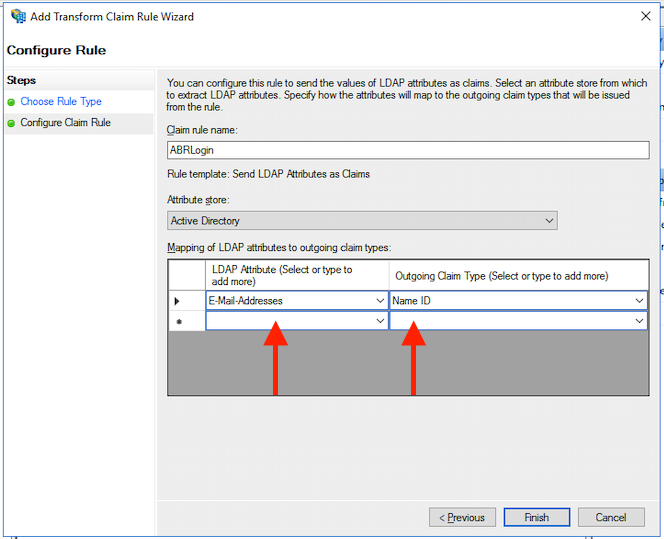
In most cases, you would want to use the LDAP rule type and use Active Directory as the attribute store. Map E-mail-Addresses to the outgoing Name ID. Pick a name for the rule.
To finish setup, you will need to download your federation metadata and upload it on the Single Sign-on Setup page here in the portal. By default, the federation metadata is available at the url https://your-adfs.server.tld/FederationMetadata/2007-06/FederationMetadata.xml
Now you can add portal users on the Portal User Logins page and allow them to use your ADFS as their Sign-on method.
Okta
Enable Okta support by going to the Single Sign-on Setup page. Click New in the Create SAML Single sign-on section. Pick the domain you want to use (usually your Active Directory or company domain name) and select Okta as provider.
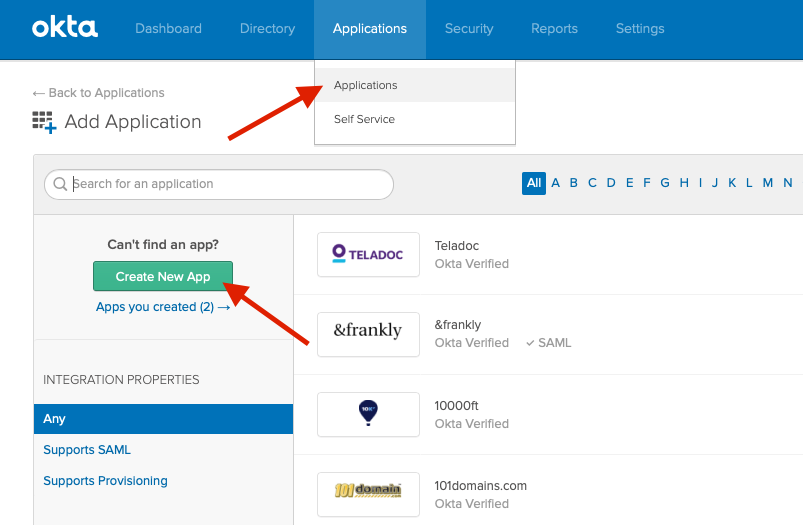
In Okta, go to the Admin section, Applications and Add Application. Choose to Create New App. Pick Web as platform and SAML 2.0 as sign on method. Enter Admin By Request as name.
Set the following SAML settings:
- Single sign on URL: https://www.adminbyrequest.com/saml
- Audience URI (SP Entity ID): https://www.adminbyrequest.com/samlmeta
- Name ID format: EmailAddress
- Application username: Email
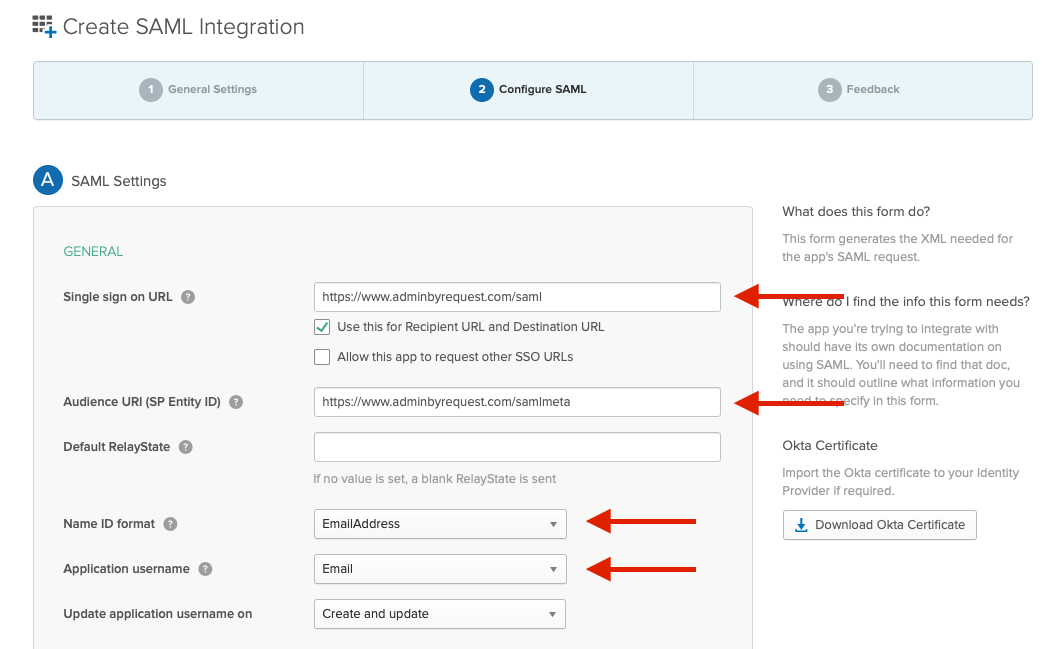
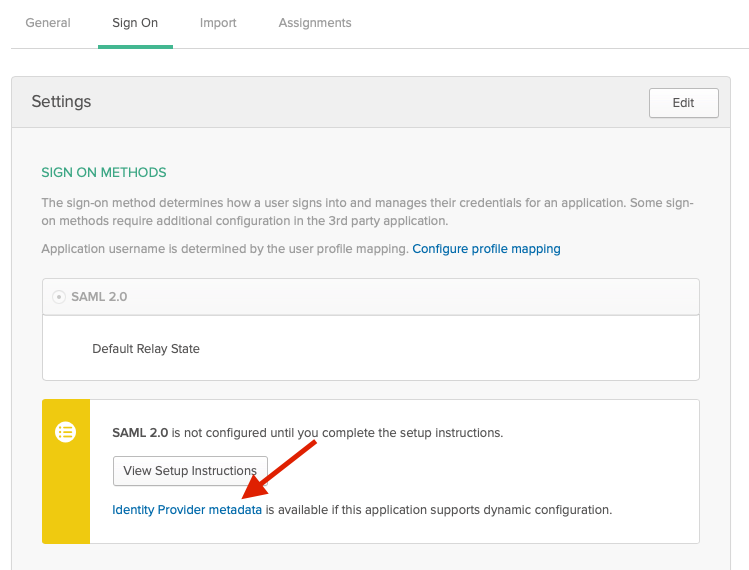
Leave the rest as-is. After creating the application, you can download your Identify Provider metadata and upload it to on the Single Sign-on Setup page in the Add Identity Provider (IDP) Metadata section.
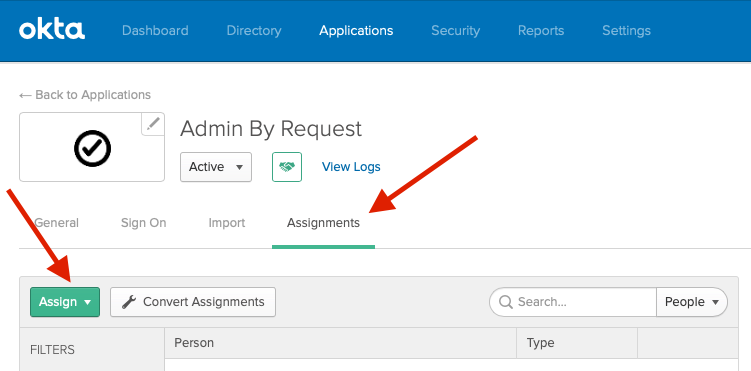
Final step is to assign Okta single sign-on to portal users. Go to the Portal User Logins page and add or edit a user and select Okta Single sign-on for [domain name] as Sign-on method. In Okta, you need add the same user under Assignments for the Admin By Request application.
Questions?
If you have questions not answered on this page, please contact us using the chat or the contact menu at the top.


