

Azure Active Directory Integration
This page serves to explain how to connect Azure AD to your Admin By Request settings to differentiate settings for users based on Azure AD groups.
Azure AD Connector
When using Admin By Request with Active Directory domain joined computers, Admin By Request settings can be differentiated for different users. Settings act as rules, such as whether “Run as admin” or “Admin Sessions” are enabled and whether or not users need approval to use them. You likely wouldn’t want for the same rules to be applied for an IT Administrator as for a Customer Relations employee. Settings are differentiated by using subsettings. As an administrator, you have a global set of default settings – and subsettings which define overruling settings for some users or computers, based on groups or Organizational Units (OU) from your Active Directory. If some or all computers are no longer domain joined, you do not have these groups and OUs to base subsettings on.
Enter “Azure AD Connector”. If your computers are Azure AD joined, or if your users connect an Office 365 mailbox (Azure AD workjoin), then Azure AD Connector can be used to bind your settings to your Azure Active Directory to create subsettings based on Azure AD user or device groups. Azure AD Connector is part of your global settings, as shown below:

Benefits
Setting up the connector provides the following benefits::
- Azure AD user and device groups can be used for subsettings
- Azure groups “Global Administrators” and “Device Administrators” (“Azure AD joined device local administrator”) are correctly detected and the tray icon will appear red
- Azure AD phone number and email is suggested as default on the request form
- Your inventory collects computer and user groups, as well as full names, phone numbers and emails from Azure AD (if enabled)
Should Azure AD Connector be used?
The answer depends on your scenario. If your computers are:
- Domain joined computers: No, the connector is not used – only if you have a subset of Azure AD joined computers, should you use Azure AD Connector
- Azure AD joined computers: Yes, then Azure AD Connector should be used.
- Stand-alone with Office 365 mailbox mapped (see further down): Azure AD Connector should only be used if you need to use subsettings.
Setting up Azure App Registration
Azure AD Connector needs an Azure AD App Registration in order to function. An App Registration is a permission to integrate with your Azure AD and consists of an Application ID and a Secret Key. To set up an App Registration in order to allow Admin By Request to query your Azure Active Directory, please follow this procedure:
- Log into your Admin By Request portal in one browser tab and go to Settings -> Authorization -> Azure AD (see screenshot above)
- Log into your Azure portal in another browser tab
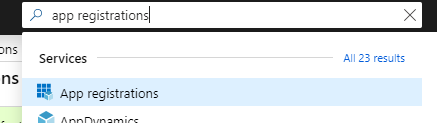
- In the search field at the top enter “App Registrations” and click it in the search results.
- Click “New registration”
- Enter a name, such as “Admin By Request Azure AD Connector” and click “Register”
- Click “API Permissions” in the left menu
- Delete the default entry named “User.Read” under “Microsoft Graph” and other default permissions that may be listed
- Click “Add a permission”
- Select “Microsoft Graph”
- Select “Application permissions”
- Expand “Directory”
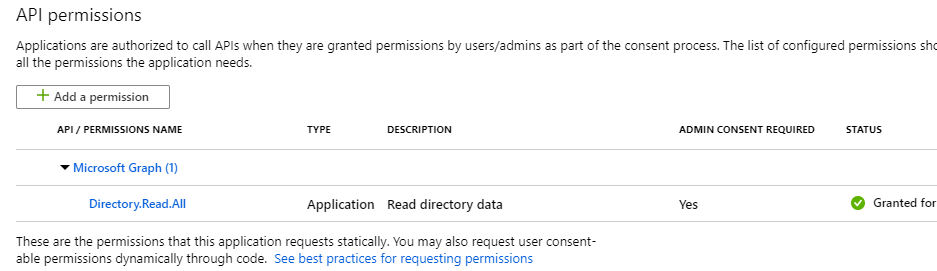
- Check “Directory.Read.All”
- Check “Add permission”. Your complete list must look like this:
- Click the “Grant admin consent” button at the bottom and confirm
- Click “Certificates & secrets” in the left menu
- Click “New client secret”
- Select “Never”
- Click the copy icon in the “value” column and paste into “Secret Key” on the Admin By Request browser tab page
- Click “Overview”
- Click the copy icon in the “Application (client) ID” column and paste into “Application ID” on the Admin By Request browser tab page
- In the Admin By Request browser tab, enter your tenant name, which is typically your legal company name appended by “.onmicrosoft.com”
- Click “Save” and a green checkmark will appear next to the button – you’re done. If you get “Entered Azure AD data is incorrect”, please verify the procedure above for errors. If you cannot get it to work, please contact us for assistance.
Note on expiry
The option to select “Never” as expiry has been discontinued by Microsoft. This means that you have to re-run the procedure every 2 years. If you forgot to do this, you will be notified on the Summary page in the Admin By Request portal when your App Registration is no longer functional. When the App Registration has expired, in practical terms it means that endpoints can no longer refresh group memberships through Microsoft Graph. The short-term impact is not catastrophic because the endpoints use a cache, but a new App Registration should be made as soon as possible after expiry.
Azure AD joined Windows 10 computers
Computers would typically be joined to Azure AD as part of the provisioning with Autopilot or similar. To join a Windows 10 computer to an Azure AD manually, follow this procedure:
- Log in as a local administrator to the Windows 10 computer
- Go to “Settings” and select “Accounts”
- Click “Access work or school” in the left menu and click “Connect” on the right side
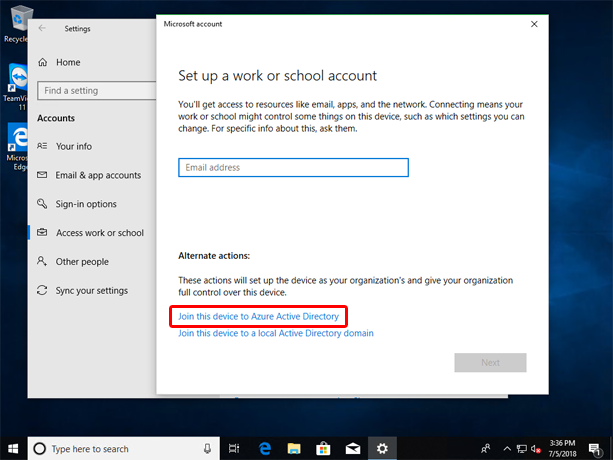
- Click the “Join this device to Azure Active Directory” option at the bottom
- Follow the rest of the pages in the wizard
If a Windows 10 computer is Azure AD joined, it behaves in the same way as an Active Directory domain joined computer, except it is using Azure AD as the directory service instead. Because the computer is now joined to Azure AD, any user from the Azure Active Directory can log on to the computer, just like in a domain:
Because both computers and users are now known entities in Azure AD, Admin By Request can retrieve the groups from both and use the correct subsettings, assuming Azure AD Connector is set up correctly.
Azure AD Global and Device Administrators
When you Azure AD join your computer, Windows 10 will add these members to the local administrator’s group:
- The Azure AD global administrator role (“Company Administrator” group)
- The Azure AD device administrator role (“Device Administrator” group)
- The user performing the Azure AD join
Admin By Request removes local admin rights from the user performing the join, but leaves the global and device administrator’s groups in the local administrator’s group. When you log on with a global or device administrator account, the tray icon will appear red, which means you are a permanent administrator.
Office 365
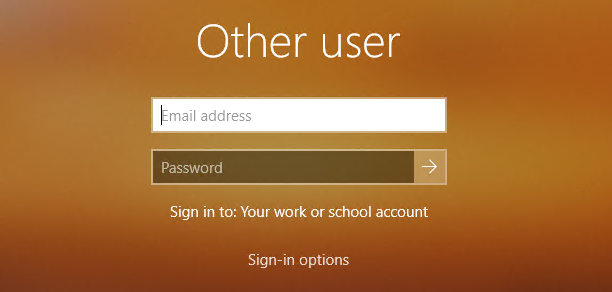
When computers are not Azure AD joined, users can still workjoin to the Azure Active Directory in order to use Azure services. This happens automatically, when the user configures an Office 365 mailbox. When the user starts Outlook, it will request your Office 365 account credentials:
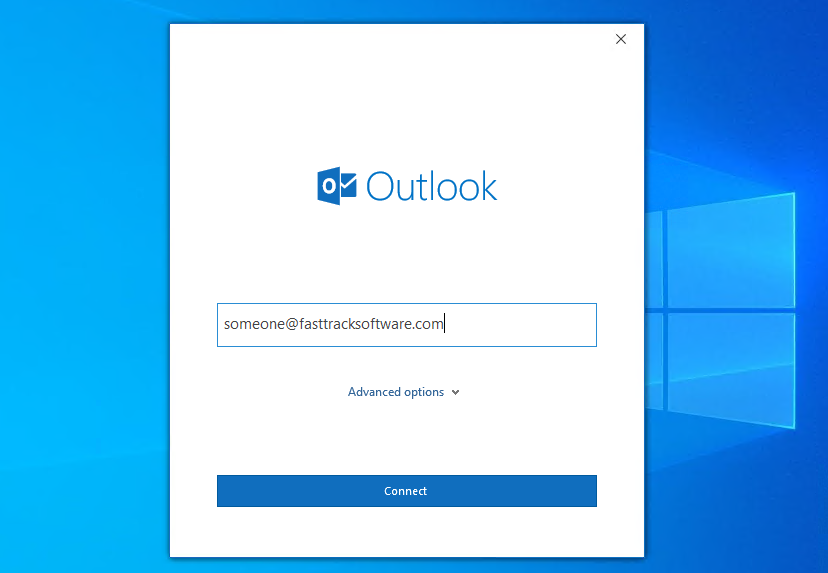
When the credentials are accepted, a workjoin happens automatically in the background and the account entered by the user will automatically appear in the workjoined list.
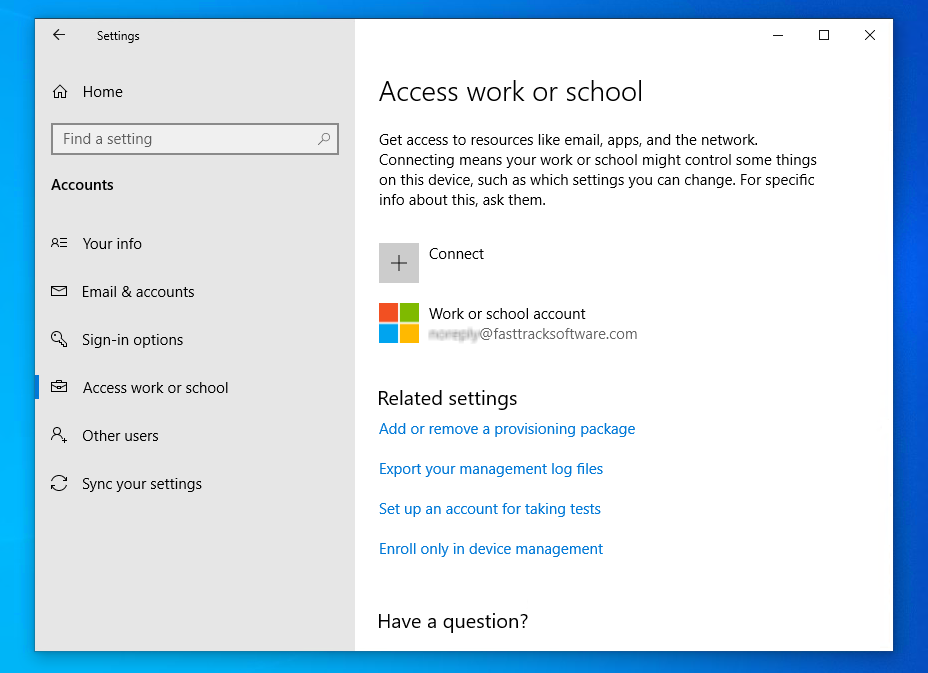
This could also be manually done by the user if they go to “Settings” -> “Account” -> “Access work or school” and add their Azure AD account. If the user removes the workjoin, Outlook no longer has a connection to Azure AD and will request for credentials again, which in turn will re-instate the workjoin. In other words – any user with a mapped Office 365 mailbox on Windows 10 is workjoined to Azure AD, and Admin By Request subsettings based on user groups will work.
Office Groups
Office groups are not collected for subsettings and inventory due to the fact that these are not security groups and are out of your direct control. Users can have thousands of Office groups, because these are created and modified continually by end users, as for example when someone creates a new Teams category.
Troubleshooting
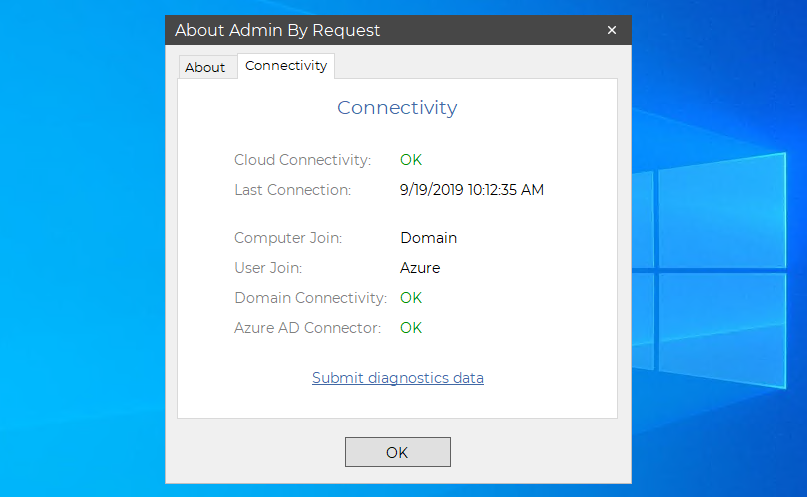
When the green checkmark appears in the portal, when saving your Azure AD Connector settings, it signifies that the adapter is functional. However, if the client doesn’t pick up the subsettings you expect, we may require assistance in determining the circumstance of the issue. For the purpose of troubleshooting, at any time you can go to an endpoint, right-click the tray icon and select “About”. The “Connectivity” tab will show you, whether there is connectivity or not:
If everything looks correct, but it is not hitting the subsettings you expected, go to your inventory. Locate the computer and look at the “Groups” left-menu. This will show you the groups the client collected for you to review. If you still have problems getting Azure AD Connector to work as you expected, please feel free to contact us at any time using the “Contact” section in the top menu.


